
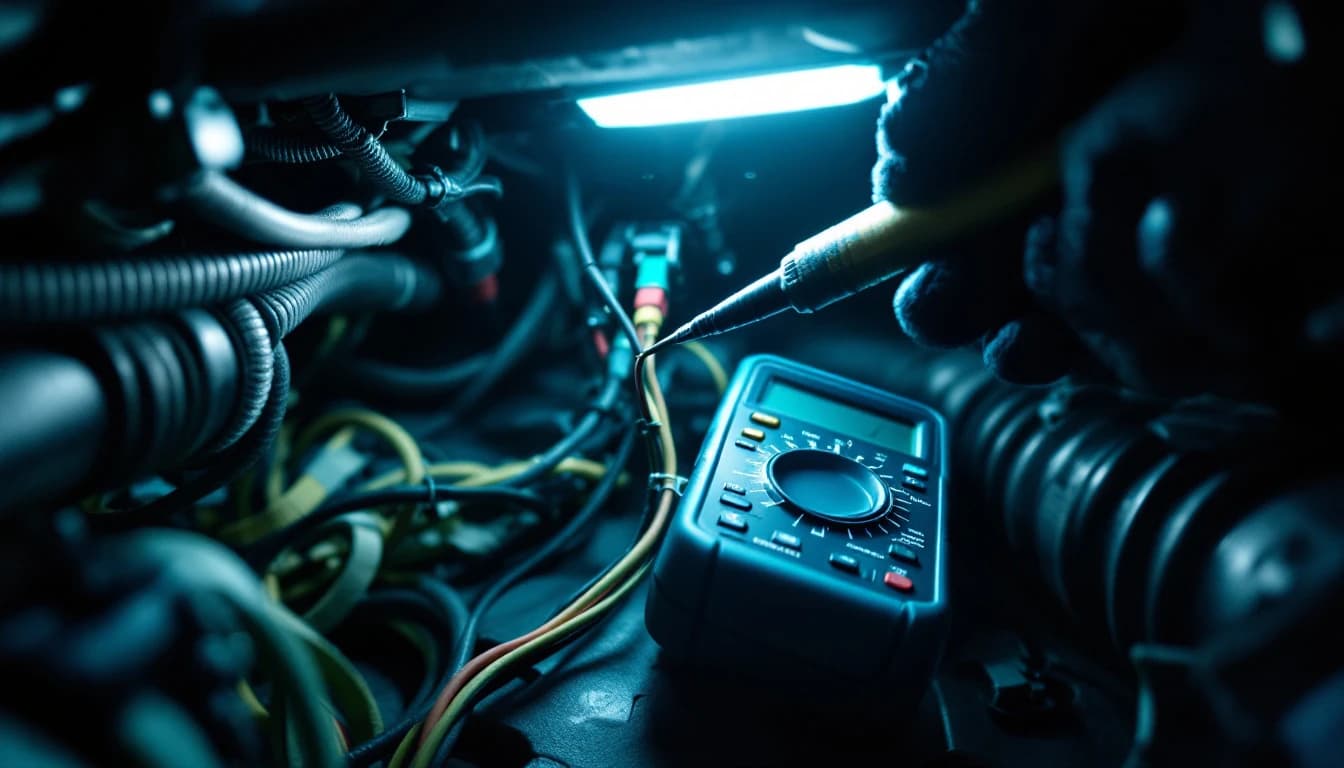
How to Know Which Module Actually Failed Before You Ship It: A Pre-Ship Diagnostic Checklist
The mistake that costs more than the repair
Every mail-in module shop sees the same thing. A module arrives, goes on the bench, gets powered, reads clean, tests clean, and communicates perfectly. There is nothing wrong with it. Somewhere out there is a car that still does not run, and an owner who has now spent shipping in both directions and a week of downtime learning that the part they suspected was innocent.
It is not a stupid mistake. It is an easy one, because modern control modules sit at the end of a long chain of things that can go wrong before them — battery, alternator, fuses, grounds, power feeds, connectors, pins, wiring, the bus itself — and every single one of those can produce symptoms indistinguishable from module failure. A module is the most visible suspect and the least likely culprit.
The odds are also stacked by the age of the fleet. Reporting aggregated by Car and Driver has noted that the average vehicle on American roads is now more than 12 years old — exactly the age at which connectors corrode, grounds go high-resistance, insulation hardens, and batteries quietly fall out of spec. Owner-experience research from J.D. Power has meanwhile found electronics, displays, and connectivity ranking among the most-reported problem categories owners cite, ahead of many traditional mechanical complaints. Put those two together and you get a lot of aging wiring producing a lot of electronic symptoms — and a lot of innocent modules getting blamed.
This is the pre-ship checklist. Work through it in order, because the order matters: each step eliminates a class of faults that would otherwise masquerade as the next one. Do it yourself if you are comfortable with a multimeter and a scan tool, or hand this article to your local shop and ask them to confirm these points before you pull anything.
Step 1: battery and charging-system health
Start here. Not second, not "after I check the codes." Here.
Low or unstable system voltage is the single biggest generator of false module diagnoses in the business. Control modules are designed to operate within a voltage window, and when they fall below it they do not politely announce "low voltage" — they behave strangely. Communication drops out. Modules reset mid-cycle. Actuators fail to move and log faults for the actuators. Memory writes fail. Multiple unrelated systems set codes at once. To a scan tool this looks exactly like a module going bad.
What to verify:
- Rested open-circuit voltage. A healthy, fully charged 12-volt battery reads about 12.6 volts after sitting. Around 12.4 is roughly three-quarters charged; 12.0 is effectively flat even though it still lights the dash.
- Voltage under load. A battery can show good open-circuit voltage and still collapse under cranking load. Have it load-tested properly — most parts stores do it for nothing.
- Charging output. With the engine running, system voltage should sit in the region of 13.5 to 14.7 volts and stay stable. A charging system that sags at idle with the load on, or that spikes, will upset modules across the vehicle.
- Ripple. A failing alternator diode injects AC ripple onto the DC system. Ripple is a notorious cause of bizarre, intermittent, multi-module faults, and it will not show on a simple voltage reading.
- Battery age. Consumer Reports has long put typical 12-volt battery service life in the region of three to five years. If the battery is older than that and you have unexplained electronic gremlins, you have a prime suspect that costs a fraction of a module.
Correct the electrical foundation, clear the codes, and drive it. A meaningful share of "failed module" cases end right here.
Step 2: power and ground at the module connector
A module cannot work without clean power and a solid ground, and both are delivered through wiring that ages, corrodes, chafes, and loosens.
At the module connector, with the connector unplugged and the circuit awake, confirm:
- Battery-feed circuits are present and at system voltage, not two volts down.
- Ignition-switched feeds come alive when they should and drop when they should.
- Grounds are actually grounds. This is the one people fake. Do not just check continuity to a nearby bolt — do a voltage-drop test: measure between the module's ground pin and the battery negative post with the circuit under load. More than a few tenths of a volt means resistance in the ground path that is starving the module.
Ground faults are the classic mimic. A corroded chassis ground behind a kick panel or under a seat produces exactly the symptom set people attribute to a dead module: intermittent operation, communication dropouts, random codes across several systems, symptoms that change with weather or vibration. The module is fine. The ground is not.
While you are there, check the fuses that feed the module — including the ones in the under-hood box that nobody looks at — and confirm any relay in the circuit actually clicks and passes voltage.
Step 3: connectors, corrosion, and backed-out pins
With power and ground proven at the harness side, inspect the physical interface.
- Pull the connector and look at it in good light. Green or white residue on the terminals is corrosion, and corrosion is resistance. Resistance on a signal line produces intermittent, nonsensical faults.
- Check for backed-out pins. A terminal that has retreated into the connector body looks perfectly seated from the outside but never actually mates. Gently tug each wire at the back of the connector — a pin that moves is a pin that is out.
- Look for spread or bent terminals, particularly on connectors that have been apart before.
- Check the locking tab. A connector that is not fully latched can pass a static test and then drop out over bumps.
- Look for evidence of heat — discoloured plastic, melted terminals — which points at a high-resistance connection that has been generating heat under load.
Connector faults are especially common on modules that live in exposed positions: wheel-well and frame-rail mounted controllers, under-seat modules, anything near a door sill or a scuttle drain.
Step 4: is the module communicating at all?
Now, and only now, ask the network question. Plug in a scan tool and attempt to communicate with the specific module.
There are two very different answers:
The module responds. It reports its identifier, it returns data, it accepts a code-clear. A module that is talking on the bus is, by definition, powered, grounded, and running its core firmware. That does not prove every function inside it works — but it dramatically narrows what can be wrong, and it means the "dead module" theory is off the table.
The module is silent. No response, "no communication," or the tool cannot find the module at all. Before concluding the module is dead, remember the three ways a module goes silent:
- It has no power or ground — which steps 1 and 2 should already have cleared.
- Its connection to the bus is broken — a damaged twisted pair, a corroded splice, a bad terminal on the communication pins.
- It is genuinely dead internally — a failed transceiver, a failed processor, a burned power section.
Only the third is a module job. And there is a diagnostic wrinkle worth knowing: a module that has failed shorted to the bus can knock out communication with other modules on the same network. If your scan tool cannot reach several modules at once, do not assume several modules failed — suspect one bad node, or a bus wiring fault, dragging the network down.
Modern vehicles make this more consequential than it used to be. Engineering literature published through SAE International has documented the growth of automotive electronic architectures to dozens of networked control units on a mainstream vehicle, with premium platforms running well past a hundred. That is a lot of nodes sharing a small number of buses, and a lot of opportunity for one fault to look like many.
Step 5: read codes across every module, not just the engine
This is the step most owners skip and most cheap code readers cannot do.
A basic OBD-II reader talks to the powertrain controller and reports emissions-related codes. That is a fraction of the picture. The fault you are chasing may live in the ABS controller, the body control module, the restraint system, the transfer case, a door module, or the gateway. You need a scan tool that performs a full-system scan — every module, all codes, including stored and pending.
What you are looking for is the pattern, not a single code:
- Codes in one module only, all pointing at circuits that module controls — a strong module-specific case, though still not proof the module itself failed.
- The same code in several modules, all describing a communication loss with one particular module — that is the network telling you which node has gone quiet, and it is one of the most useful patterns there is.
- Codes everywhere, in unrelated systems, all at once — go back to step 1. That is the signature of a voltage or ground problem, not eight simultaneous module failures.
- Low-voltage or system-voltage codes present anywhere — treat every other code as unreliable until the electrical fault is fixed and the codes are cleared and re-run.
Record everything with freeze-frame data before clearing. The conditions under which a code set often tell you more than the code.
Step 6: "reports a fault" versus "is the fault"
Here is the distinction that separates a good diagnosis from an expensive guess.
A module reporting a fault about a sensor, actuator, or circuit is doing its job. When an ABS controller logs a wheel-speed sensor fault, the controller is telling you it lost a signal it expects. That signal can be missing because the sensor failed, the tone ring is damaged or packed with debris, the wiring chafed against a suspension component, the connector corroded, or — least likely — the input circuit inside the controller failed. The module is the messenger in four of those five cases.
The rule of thumb that has saved more modules than any other: a module that can tell you what is wrong is usually not the thing that is wrong. To report a fault it has to be powered, grounded, running, and communicating. That is a functioning module describing a problem outside itself.
You start building a genuine case that the module is the fault when:
- The reported circuit tests good end to end — component, wiring, connector all verified — and the module still reports it missing
- The module commands an output and nothing happens at the module's own pin, with the load and wiring proven good
- The module has an internal fault code, not a circuit code
- The module is silent on the bus with power, ground, and bus wiring all confirmed
- There is visible physical evidence: water intrusion, burned or swollen components, corrosion inside the housing
Notice how much verification sits in front of each of those. That is the point.
A technician who spends his days receiving other people's suspected-failed modules put it bluntly:
"The ones that come in dead are almost always wet or burned — you can see it the second the cover comes off. The ones that come in because a scan tool pointed a finger at them test perfect, every time. If a module was awake enough to write you a fault code, it was awake enough to do its job. Check the battery, check the ground, check the plug, and you will keep two out of three of those boxes from ever being shipped." — Independent automotive electronics repair technician, 16+ years in module diagnosis and board-level repair (anonymized)
This distinction plays out constantly on no-start complaints, where an immobilizer refusing to authorize the engine and a genuinely failed control module produce the same dead crank. Working out which one you have before you ship anything is exactly what telling an immobilizer problem apart from a failed module walks through.
Step 7: water intrusion — where specific modules drown
Water kills modules, and it kills them in predictable places. If a module is in a wet location, check for water before you check anything else, because it converts a maybe into a certainty.
Places worth looking:
- Under seats and in footwells — body, restraint, and comfort modules live here, and they drown from heater-core leaks, plugged sunroof and cowl drains, and door-membrane failures.
- Behind kick panels and A-pillars — a classic path for windshield and cowl leaks.
- Under the cowl / scuttle — modules mounted near the plenum sit directly under the drain path.
- In the trunk or spare-well — a leaking tail-light gasket or trunk seal fills the well and submerges whatever is mounted low.
- Wheel wells and frame rails — ABS controllers and some body electronics take direct road spray and salt.
- Behind the front bumper or in the engine bay near washer bottles.
A module that has been wet usually shows it: staining on the case, a water line inside, corrosion crusting the connector pins, a rattle of dried silt. If you find that, you have both your fault and its cause — and you must fix the leak, or the replacement will follow the original.
Flood history is a real market-wide issue too. The National Insurance Crime Bureau has warned after major storms that flood-damaged vehicles re-enter the used market in very large numbers, with post-hurricane totals described in the hundreds of thousands of vehicles. If you bought used and are fighting unexplained electronics, that is worth considering. The National Highway Traffic Safety Administration treats electrical and electronic integrity as safety-relevant, and its public owner-complaint and recall database is a genuinely useful place to check whether other owners of your exact platform and model year report the same module failure — a known pattern is a strong hint, and the absence of one is a hint too.
Step 8: wiring and harness faults that mimic module failure
The last class of impostor is wiring, and it is the hardest to find because it is usually intermittent.
- Chafe points — wherever a harness crosses a bracket, passes through a bulkhead, or runs near a moving suspension or steering component.
- Door and tailgate boots — wires flex thousands of times and break inside intact insulation. A window, lock, or mirror module accused of failing is very often a broken wire in the door boot.
- Rodent damage — extremely common, and modern soy-based wire insulation is attractive to chewing. MotorTrend and Hagerty have both covered rodent-chewed harnesses as a widespread and expensive owner complaint on modern vehicles. Look for shredded loom, bare copper, and droppings.
- Previous repairs — aftermarket alarms, stereo installs, trailer wiring, and prior collision repairs are prolific sources of tapped, spliced, and poorly grounded circuits.
- Corroded splices and ground blocks, especially in salt-belt vehicles.
A wiring fault that opens under vibration or heat produces the exact behavior owners describe as "the module works sometimes." Modules do not usually work sometimes. Wires do.
Two module families where owners most often accuse the module and find wiring instead: keyless-entry and receiver electronics, and ABS controllers with wheel-speed circuits. If your remote has stopped working, the decision tree in the key fob module repair guide and the receiver-side walkthrough in keyless entry receiver module failure diagnosis will separate a fob, an antenna, a wiring fault, and an actual failed keyless entry module repair job at $125.
The pre-ship checklist at a glance
| Step | What you check | If it fails, the fault is | Ship the module? |
|---|---|---|---|
| 1 | Rested and cranking battery voltage, charging output, ripple, battery age | Battery or charging system | No |
| 2 | Power feeds and ground voltage-drop at the module connector | Wiring, fuse, relay, or ground path | No |
| 3 | Connector corrosion, backed-out pins, spread terminals, heat damage | Connector or terminal | No |
| 4 | Does the module respond on the bus at all | Bus wiring, or a shorted node dragging the network | No, unless bus wiring is proven good |
| 5 | Full-system scan across every module, with freeze-frame | Read the pattern before condemning anything | Not yet |
| 6 | Does the module report a fault, or is it the fault | Circuit codes point outward, not at the module | Only after outward causes are cleared |
| 7 | Water intrusion, corrosion inside the housing, staining | Module is likely genuinely dead — and fix the leak | Yes, plus repair the water source |
| 8 | Chafe points, door boots, rodent damage, prior repairs | Harness | No |
If you reach the bottom of that table with clean power, clean grounds, clean connectors, verified circuits, and a module that is either silent with everything else proven or reporting an internal fault, you have a real case. Ship it.
When you genuinely cannot tell
Sometimes the checklist runs out and the answer is still ambiguous. The circuits test good, the module responds but behaves wrongly, or the fault is so intermittent that nothing will reproduce on demand. That is not a failure of the process — it is a normal outcome on aging vehicles, and it is exactly what bench evaluation exists for.
A bench evaluation at $150 puts the module on a regulated bench supply, isolated from every variable in your car. It is powered, read, communication-tested, and inspected internally for water, corrosion, burned components, and physical damage. You get a definitive answer about the module itself: functional, repairable, or failed — with no vehicle wiring, no battery, and no grounds in the way to confuse the result.
That isolation is the whole value. On the bench, a module either works or it does not, and there is nothing else to blame.
What to send with the module
Whatever service you are booking, the quality of the information you send changes the outcome more than anything else. Send:
- Year, make, model, engine, and VIN. Coverage and configuration depend on all of them.
- The module's part number and a clear photo of its label. This confirms the exact variant.
- A plain description of the symptom — what the car does, when it started, what changed just before it started.
- The actual fault codes, ideally the full-system scan, not just the powertrain codes.
- What you have already tested, including your voltage and ground readings. This prevents duplicated work.
- Photos of the connector and the module housing, especially if there is any sign of water or corrosion.
- Whether the vehicle has flood history, rodent damage, aftermarket electronics, or prior collision repair.
Pack the module properly: anti-static bag first, then a padded box with the module unable to move inside it. Physical shipping damage to a working module is a genuinely miserable way to lose one. The step-by-step packing method is in how to remove, package, and ship a car module.
Auto Module Lab is a mail-in-only bench workshop serving customers nationwide, at 1168 W Pioneer Parkway, Arlington TX 76013. Return shipping is customer-paid and chosen at checkout, from $14.95. Anything touching keys, immobilizer, or vehicle identity requires proof of ownership — registration or title matching your identification. Common bench services include ABS module repair at $250, TIPM repair for Chrysler, Dodge and Jeep at $299, and keyless entry module repair at $125; the full list is on the services hub.
Frequently asked questions
How do I know if a module is bad or if it is just a wiring problem? Verify power and ground at the module connector with a voltage-drop test, confirm the circuits the module reports as faulty actually test good end to end, and check whether the module still communicates on the bus. A module with clean power, clean grounds, and verified circuits that still misbehaves is a real suspect; one accused on codes alone usually is not.
Can a weak battery really make a module look like it failed? Yes, and it is the most common false diagnosis there is. Below its designed voltage window a module resets, drops off the network, fails to move actuators, and logs codes across unrelated systems — behavior that reads on a scan tool exactly like internal failure. Always verify rested voltage, cranking performance, charging output, and alternator ripple first.
If my scan tool says "no communication" with a module, is it dead? Not necessarily. A silent module has three possible causes: it has lost power or ground, its connection to the bus is broken, or it has genuinely failed internally. Only the third is a module repair, and a module that has failed shorted to the bus can also silence other modules, so several unreachable modules usually means one bad node or a bus wiring fault.
Why do I need to scan every module instead of just the engine? Because a basic OBD-II reader only reaches the powertrain controller and emissions-related codes, while the fault you are chasing may live in ABS, body, restraint, transfer case, or gateway modules. The pattern across all modules is the diagnostic information — the same communication-loss code appearing in several modules identifies the node that went quiet.
What is the difference between a module reporting a fault and a module being the fault? A module that reports a sensor or circuit fault is powered, running, and doing its job describing a problem outside itself — most often a sensor, wiring, connector, or mechanical component. It becomes the suspect only when the reported circuit tests good end to end, it has an internal fault code, it fails to drive an output at its own pin, or it is silent with power and bus wiring proven.
What if I have checked everything and still cannot tell? That is a normal outcome, and a $150 bench evaluation resolves it by testing the module in isolation on a regulated bench supply, away from the battery, grounds, and wiring that confuse in-vehicle testing. You get a definitive answer — functional, repairable, or failed — before committing to a repair.
What information should I send with a module? Send the VIN, year, make, model, engine, the module part number with a photo of its label, the full-system scan codes rather than powertrain codes alone, a plain description of the symptom and when it started, what you have already tested with your voltage readings, and photos of the connector and housing if there is any sign of water or corrosion.
The bottom line
Shipping a good module is the most avoidable expense in mail-in module work, and avoiding it takes an afternoon with a multimeter and a proper scan tool. Verify battery and charging health first, because low or noisy voltage fakes more module failures than every other cause combined. Prove power and ground at the module connector with a voltage-drop test, not a continuity beep. Inspect the connector for corrosion and backed-out pins. Ask whether the module communicates on the bus at all, and remember that one shorted node can silence several. Scan every module, not just the engine, and read the pattern rather than a single code.
Then apply the rule that matters most: a module reporting a fault is usually not the fault. It is a working module describing a problem outside itself — a sensor, a tone ring, a chafed wire, a corroded terminal. The genuine module cases are the ones where the outward causes have been eliminated, or where you find water, corrosion, or burned components inside the housing.
When the checklist runs out and the answer is still unclear, a bench evaluation at $150 tests the module in isolation and gives you a straight answer instead of a guess. Everything here is bench work, mail-in only, nationwide, from the Arlington workshop — with proof of ownership required for key and immobilizer work and return shipping customer-paid from $14.95. Text us the symptom, the VIN, and your scan results, and you will get an honest opinion on whether the module is even worth putting in a box.
Ship your module today
Flat-rate pricing, 24-hour bench turnaround, return speed your choice at checkout. Most jobs back on your bench within a week.
More from the Lab

Your Programmed Module Came Back and the Car Still Will Not Start — A Systematic Troubleshooting Guide
15 min · July 26, 2026

Airbag Module Reset vs Replacement: Real Cost Comparison (2026 Guide)
12 min · July 26, 2026

P0606 PCM Processor Fault: Diagnosis, Repair vs Replacement, and the Cheapest Real Fix
12 min · July 26, 2026

Can a Mail-In Service Really Program a Module to My VIN Without the Dealer?
13 min · July 26, 2026